
$ 0.00
0
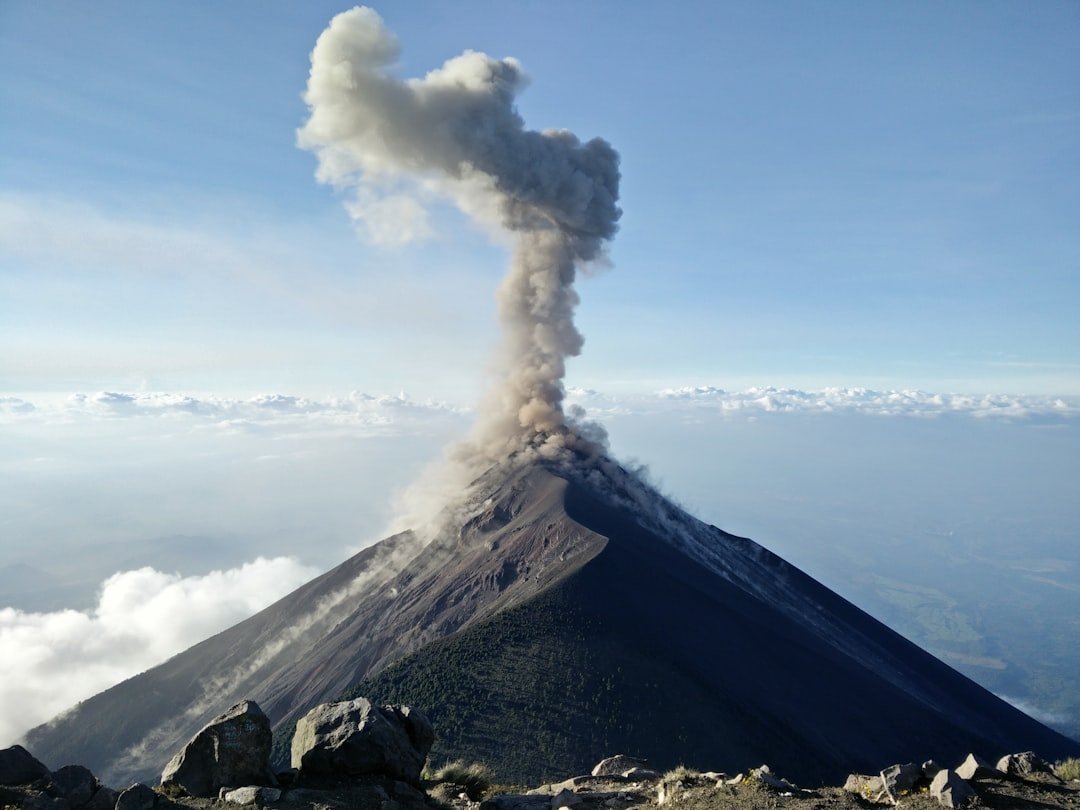
Imagine standing on a cold, windswept ridge at 3,700 meters above sea level, clutching a steaming cup of hot chocolate, while every fifteen to twenty minutes the earth beneath your boots violently rumbles. A few miles across an abyssal valley, Volcán de Fuego explodes into the twilight sky, ejecting molten orange lava hundreds of feet into the air. This isn’t a scene from an action movie; it is the raw, untamed reality of hiking Guatemala’s famous Acatenango Volcano.
The overnight trek up Acatenango is widely regarded as one of the most thrilling adventure experiences in Central America, if not the entire world. However, it is by no means a walk in the park. You will push through steep microclimates, battle thinning air, endure freezing nighttime temperatures, and struggle up relentless volcanic scree. To successfully conquer this giant and witness Fuego’s fiery spectacle safely, you need immaculate planning, proper gear, and realistic physical preparation.
In this comprehensive, hyper-detailed guide, we break down everything you need to know to complete the 2-day overnight Acatenango volcano trek. From route breakdowns across four distinct ecosystems to gear rental hacks, altitude sickness strategies, and real cost breakdowns—this is your ultimate blueprint for an unforgettable journey into the cloud line.
Before putting on your hiking boots and stepping foot on the trail, it is vital to understand the physical profile of this trek. Acatenango is an inactive stratovolcano paired with its volatile twin, Volcán de Fuego. While Acatenango hasn’t erupted since 1972, Fuego is in a near-constant state of active eruption.
The main effort involves hiking from the village trailhead at La Soledad up to high-altitude basecamps perched on the shoulder of Acatenango, facing Fuego directly. Pro Tip: The standard route covers roughly 14 kilometers (8.7 miles) round-trip, but don’t let the short distance fool you—the elevation gain is massive.
Guatemala’s climate is split into two primary seasons: the dry season (November through April) and the wet/rainy season (May through October). The optimal time to trek Acatenango is between December and March, when sky visibility is at its peak, rainfall is minimal, and overnight views of Fuego’s lava streams are unobstructed by heavy storm clouds.
During the wet season, hiking is still very possible, but morning rain can turn the lower trail into slippery mud, and afternoon fog often completely obscures the volcano. WARNING: Hypothermia is a real danger on Acatenango during the rainy season when wet gear combines with sub-zero summit wind chills. Always double-waterproof your sleeping gear and clothing!
Technically, local park authorities require hikers to be accompanied by certified guides. Practically speaking, attempting this trek unguided is exceptionally dangerous due to rapid weather shifts, sudden freezing temperatures, poorly marked trail forks, and high-altitude risks. Local Hack: Booking a reputable guide service ensures you get access to permanent, sheltered basecamp cabins equipped with heavy-duty sleeping bags and fire pits, saving you from hauling heavy camping gear up the mountain.
Make sure to reserve your trekking experience with established local outfitters. You can browse verified local operators and reserve your slot early through our booking partner: Acatenango Overnight Guided Trek with Basecamp Cabin.
The hike up Acatenango takes you through four dramatically different ecological zones, each presenting its own terrain challenges and physical demands. Knowing what lies ahead helps you pace yourself effectively.
07:30 AM – 09:30 AM: Pick-up and Drive to Trailhead
Most tour agencies pick you up directly from your hotel or hostel in Antigua Guatemala. The drive to the starting point in La Soledad takes roughly one hour. Here, you will pay park entry fees, meet your local guides, double-check your gear, and purchase trekking pole rentals or last-minute snacks.
09:30 AM – 11:30 AM: Zone 1 – Agriculture Fields & Volcanic Scree
The trek begins abruptly with what many consider the single hardest section of the entire hike. The trail starts on a steep incline cutting directly through local corn and cabbage fields. The surface is composed of fine, loose volcanic dust and gravel (scree). WARNING: For every two steps forward in the lower scree, you will slide half a step back. Take slow, deliberate, rhythmic steps to conserve energy early on.
11:30 AM – 01:30 PM: Zone 2 – The Tropical Cloud Forest
After passing the official park registration booth, the trail transitions into a beautiful, dense cloud forest. Ancient trees draped in Spanish moss, gigantic ferns, and wild bromeliads dominate this section. The shade offers welcome relief from the sun, but the damp ground can be slick, and the incline remains relentless. Agencies typically pause here for a 30-minute packed lunch break.
01:30 PM – 03:30 PM: Zone 3 – High Alpine Pine Forest & The Ridge
As elevation surpasses 3,200 meters, the damp cloud forest yields to tall alpine pine trees and golden grass. The air grows noticeably cooler and thinner. Your lungs will work harder, and your heartbeat will accelerate. Fortunately, the trail gradient levels out slightly as you navigate long switchbacks winding around the side of the mountain.
03:30 PM – 04:00 PM: Arrival at Basecamp
You emerge from the tree line into the high alpine zone to reach your group’s private basecamp. Most basecamps are perched on the eastern shoulder of Acatenango, directly facing Volcán de Fuego across a dramatic 1-kilometer-deep gap. The moment you drop your heavy pack and hear Fuego’s deep, thunderous boom for the first time, all physical exhaustion instantly evaporates.
Once at basecamp, options diverge depending on your remaining energy levels and the weather:
04:00 AM: The Final Summit Push
Your guides will wake you up while it is still pitch black. You will strap on your headlamp, pull on every layer of cold-weather gear you brought, and tackle Zone 4: the bare volcanic summit cone. Pro Tip: Leave your heavy main backpack inside your basecamp tent/cabin! You only need a tiny daypack with water, camera gear, and an extra jacket for the summit push.
The final push takes about 1.5 hours up extreme 45-degree scree inclines. Temperatures at the top frequently plunge below -5°C (23°F) with strong wind chill. However, reaching the actual peak of Acatenango at 3,976 meters just as the sun illuminates the sea of clouds below—and witnessing Fuego erupting below you—is a bucket-list memory you will carry forever.
07:00 AM – 11:30 AM: Breakfast and Rapid Descent
After soaking in the 360-degree views of Lake Atitlán, Agua Volcano, and Pacaya Volcano from the summit, you slide down the volcanic scree back to basecamp in just 20 to 30 minutes. Eat a quick breakfast, pack your belongings, and begin the steep descent down to La Soledad. Local Hack: Descending takes less than 2.5 hours, but it exerts tremendous force on your knees and toes. Tie your laces extra tight to keep your feet from jamming into the front of your boots! Shuttles will be waiting at the bottom to transport you back to Antigua by early afternoon.
Acatenango’s summit touches nearly 4,000 meters. Altitude sickness (Acute Mountain Sickness or AMS) does not care how physically fit you are; it strictly affects anyone who ascends too fast without allowing their body time to adjust to lower oxygen levels.
Antigua sits at an elevation of 1,530 meters (5,020 feet). Do NOT arrive in Antigua and attempt to hike Acatenango the very next morning! Pro Tip: Spend a absolute minimum of 48 to 72 hours relaxing and exploring in Antigua before setting off on the trek. This gives your bloodstream a critical head start on producing red blood cells.
During your acclimatization days in Antigua, drink plenty of fluids, limit heavy alcohol consumption, and consider taking a warm-up hike up the nearby Cerro de la Cruz viewpoint. Check out top-rated hotels with great lounge areas for acclimatizing via Acclimatization Hotels in Antigua Guatemala
Packing for Acatenango is a balancing act. You need high-performance winter clothing to survive the freezing nights, but every single ounce you pack must be carried up thousands of meters on your own shoulders (unless you hire a private horse or porter).
The key to staying warm without carrying heavy bulk is multi-layering. As you hike uphill during the heat of the afternoon, you will strip down to a light shirt. When you stop moving at basecamp, temperatures plummet rapidly.
Most basic tour packages provide standard cooked meals (Lunch, Dinner, Breakfast), but you are expected to carry your own water supply. Pro Tip: Pack 4 liters of water in total—3 liters for personal drinking and 1 liter to hand over to the camp chefs for cooking meals and preparing hot tea. Additionally, stock your pockets with high-calorie snacks like trail mix, snickers bars, dried fruit, and energy gels.
Hiking Acatenango is one of the best-value adventure experiences on the planet. Even premium, high-end agency offerings remain remarkably affordable compared to high-altitude treks in the Andes or Himalayas.
1. Budget / Hostel Tours (250 – 350 Quetzales / $32 – $45 USD)
Includes basic transport, minimal guides, communal tents, thin sleeping mats, and simple packed meals. You usually have to carry heavier gear yourself, and safety margins can be thinner. Ideal for rugged backpackers on tight shoe-string budgets.
2. Mid-Range Eco-Tours (450 – 650 Quetzales / $58 – $85 USD)
The sweet spot for 90% of travelers! Includes comfortable round-trip shuttles, higher guide-to-hiker ratios, nutritious hot meals, warm rental jackets, and—most importantly—permanent basecamp wooden A-frame cabins fitted with real mattresses and thick winter sleeping bags.
3. Luxury / Private Glamping Tours (1,000 – 1,800 Quetzales / $130 – $230+ USD)
Features private heated dome tents, gourmet cooked meals, private porters included to carry your heavy bags, small private groups, and luxury wine/charcuterie setups while watching eruptions.
Keep local cash (Guatemalan Quetzales) on hand in small bills, as there are zero ATMs anywhere on the mountain:
It is easy to get caught up in the romantic vision of drinking cocoa next to an erupting volcano, but you must remember that Fuego is a dangerous, active force of nature. Respecting mountain rules and prioritizing safety is paramount.
Volcán de Fuego is continuously monitored by INSIVUMEH (Guatemala’s national seismology and volcanology institute). Standard basecamps are situated at a safe distance on Acatenango’s shoulder, outside the lethal pyroclastic blast zone.
However, when hiking the optional extension ridge toward Fuego, guides closely evaluate wind direction, gas emissions, and eruption patterns. WARNING: Never disobey your guide or cross safety barriers on the Fuego ridge. If your guide says an eruption is too violent or the wind is pushing toxic sulfur gas toward the trail, turn back immediately without argument.
Acatenango suffers heavily from over-tourism and plastic litter. Help preserve this ecological miracle for future adventurers by following strict Leave No Trace rules:
Without a shadow of a doubt, hiking Acatenango is one of the most physically taxing, cold, and intense challenges you can experience on a trip through Central America. Your legs will burn, your lungs will ache, and you will likely lose a few layers of skin to volcanic dust.
Yet, when night falls over the highlands, and you sit above an endless blanket of cloud cover, watching red rivers of incandescent rock erupt from the crater of Volcán de Fuego against a backdrop of shooting stars—every single grueling step up that mountain becomes worth it a thousand times over.
With the right physical preparation, proper cold-weather gear, ample acclimatization time in Antigua, and a reliable tour guide, conquering Acatenango will undoubtedly be the highlight of your travel adventures. Respect the volcano, pace your steps, and prepare for an unforgettable show high above the clouds!